How to Map a Construction Site: A Step-by-Step Process
Quick Summary
Construction site mapping is the process of capturing a jobsite’s physical conditions as accurate, measurable digital data. Drone photogrammetry and LiDAR turn site imagery into orthomosaic maps, 3D models, and point clouds that teams can measure and compare against the plan. It gives a time-stamped record of what the site actually looks like.
- Drones suit most outdoor sites because they cover large areas quickly without scaffolding.
- Place ground control points across the site before flying so the model ties to real-world coordinates.
- Hold back independent checkpoints to validate accuracy, rather than reusing the control points.
- Confirm the datum, projection, and units on every deliverable before comparing it to design files.
- Run a small pilot on one site to catch integration problems before committing to software.
Table of Contents
- What Construction Mapping Is and Who Uses It
- Choosing Drone or Ground-Based Data Capture
- Step 1: Define the Project Goals and Deliverables
- Step 2: Plan Flights, Control Points, and Capture Passes
- Step 3: Process Imagery into Orthomosaics, 3D Models, and Point Clouds
- Checking Accuracy and Avoiding Common Mistakes
- Choosing Construction Mapping Software for Your Project Type
- Scheduling Your First Site Map with SkyeTech Aerial
- Frequently Asked Questions
What Construction Mapping Is and Who Uses It
Last Updated: November 14, 2026
Construction site mapping is the process of capturing a jobsite’s physical conditions as accurate, measurable digital data. At SkyeTech Aerial, we use drone photogrammetry and LiDAR to turn site imagery into orthomosaic maps, 3D models, and point clouds that teams can measure, compare, and share. Construction mapping gives a project team a time-stamped record of what the site looks like, not just what the plans say it should look like.
The people who rely on this data vary widely. Construction managers at mid-to-large firms use it to track progress and verify subcontractor work against the plan. Infrastructure professionals use it to monitor roadways, utilities, and other assets. Real estate developers use high-precision site models for project planning and topographic work. Public safety officials and commercial asset managers use aerial data for incident assessment, roof checks, and parking lot inspections.
Most of these users share one problem: field conditions change faster than paper records. A site can shift several times a week. Mapping gives teams a current baseline they can measure against.
Choosing Drone or Ground-Based Data Capture
Drones and ground-based scanners both capture site data, but they suit different jobs. Drones cover large areas quickly and reach roofs, slopes, and stockpiles without scaffolding. Ground-based tools such as terrestrial laser scanners capture fine detail on structures, interiors, and tight spaces.
Each method has trade-offs:
- Drones: Fast over large sites and efficient for progress tracking. Weather, wind, and airspace rules limit when they can fly.
- Terrestrial scanners: Very precise at close range and useful indoors. Surveying a large site takes far longer, with more setups.
- Hybrid approaches: Many projects combine both, using drones for the site-wide view and ground capture for detailed areas.
For most outdoor construction sites, drone capture is the practical starting point.
Step 1: Define the Project Goals and Deliverables
Start by deciding what the map must answer. A grading check needs different outputs than a monthly progress record. Write down the decisions the data will support, such as confirming pad elevations, calculating stockpile volumes, or checking subcontractor work.
Then list the deliverables your team needs: orthomosaic maps, 3D models, point clouds, or volume reports. Set the required accuracy and the capture frequency. Teams that skip this step often collect data they cannot use.
Step 2: Plan Flights, Control Points, and Capture Passes
Good data starts with flight planning. Define the site boundary, set the altitude, and choose the image overlap. High front and side overlap helps the software match images accurately.
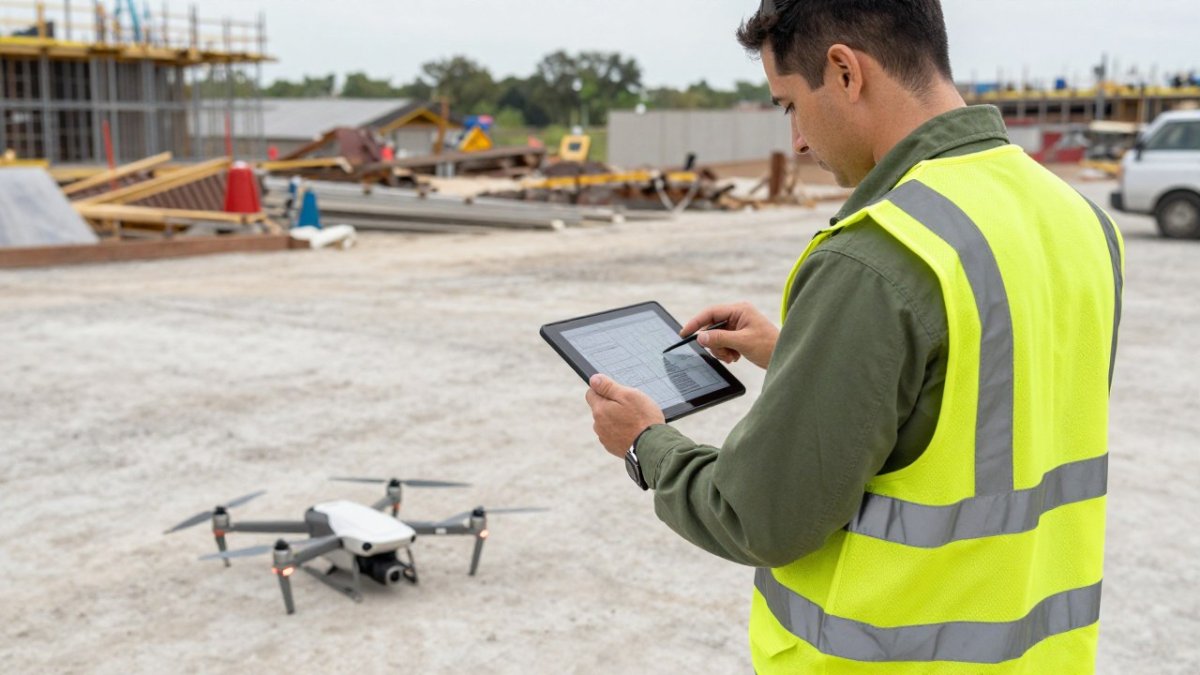
Place ground control points across the site before flying. Survey them with a GPS or total station so the model ties to real-world coordinates. Spread them across the site, including the corners and any high or low areas. Capture passes should cover the full site in a consistent grid, and the pilot should note weather and wind conditions at each flight.
Watch out: Flying without enough control points is the most common cause of elevation errors that show up later during grading checks.
Step 3: Process Imagery into Orthomosaics, 3D Models, and Point Clouds
After capture, processing software aligns the images and builds the outputs. Photogrammetry produces orthomosaics, which are measurable maps, along with 3D models and dense point clouds. SkyeTech Aerial uses best-in-class platforms such as DroneDeploy, Pix4D, and DJI Terra for this work.
Check the results before sharing them. Confirm that control points line up, review the model for gaps or distortion, and compare elevations against known benchmarks.
Checking Accuracy and Avoiding Common Mistakes
Accuracy is the part of construction site mapping that decides whether a map is a useful decision tool or a pretty picture. A model can look accurate and still contain elevation errors large enough to affect a grading check. The fix is to plan accuracy into the workflow rather than inspect it at the end.
Start with the coordinate system. Every map should be tied to a known project coordinate system and datum so measurements match the design files. If the map is delivered in an arbitrary local coordinate frame, volume and elevation comparisons against CAD or BIM models will drift. Ask the provider to state the horizontal and vertical datum, the projection, and the units on the deliverable, not just the file format.
Ground control is the backbone of that tie. Place control points around the perimeter and across the interior of the site, and add points at grade breaks, stockpile bases, and any area where elevation matters. Survey each point with a total station or a survey-grade GPS receiver, and record the point coordinates in the project system. Control point density depends on the site, with denser spacing on uneven terrain or where cut-and-fill is active.
RTK and PPK both improve image geotags, but they do not replace ground control. RTK corrects positions in real time using a base station or network correction service; PPK corrects them after the flight using logged base data. Either method reduces the number of ground control points needed, but checkpoints still matter.
Validation is a separate step from processing. After the model is built, measure a set of checkpoints that were not used to build it and compare the map elevations and positions to the surveyed values. Record the differences and compare them to the tolerance the project requires. Required tolerances vary by project; earthwork and grading decisions generally need tighter vertical agreement than progress documentation.
Watch out: Using the same points for control and validation hides error, always hold back independent checkpoints.
Common mistakes that undermine accuracy include:
- Flying in poor light, strong wind, or low sun, which blurs images and weakens matching
- Skipping control points to save time, then discovering elevation drift during a grading check
- Using outdated site plans as the baseline instead of a current survey
- Failing to re-survey after major earthwork changes, so the control no longer matches the ground
- Processing imagery without reviewing the alignment report for gaps, weak overlaps, or camera errors
- Delivering a model without stating datum, units, and accuracy so the field crew cannot trust it
A practical quality-assurance routine is to review the alignment report, confirm control residuals, run checkpoint comparisons, and inspect the model for holes or distortion before sharing. Keep the control report and checkpoint results with the deliverable so the team can see how the map was validated. That record is what lets a project manager use the map for a payment application or a grading decision instead of treating it as a visual reference.
Choosing Construction Mapping Software for Your Project Type
Software choice should follow the decisions the map supports, not the feature list. A platform that excels at progress photos may be weak at cut-and-fill volumes, and a survey-grade processing tool may be overkill for a monthly visual record. Match the tool to the project phase and the deliverable.
For early site work and earthwork, prioritize volume calculation, cut-and-fill tools, and elevation comparison against design surfaces. For structural and interior progress, prioritize time-based comparison, markup, and the ability to overlay drawings. For infrastructure and roadway work, prioritize survey-grade accuracy, control point support, and export to design files. For owner reporting, prioritize cloud sharing, permissions, and simple viewer access for people who do not run the software.
Integrations and data handoff are where most implementation problems appear. Mapping outputs need to move into the systems the team already uses:
- CAD and design files: export orthomosaics and surfaces in formats such as GeoTIFF, DXF, LandXML, and point clouds in LAS or LAZ so they open in civil design software.
- BIM and coordination: bring point clouds and meshes into BIM coordination tools to compare as-built conditions against the model and flag clashes or deviations.
- GIS: publish orthomosaics and surfaces to a GIS so asset managers and public works teams can combine them with parcel, utility, and roadway data.
- Project management and field workflows: push maps, markups, and issues into project management platforms and field apps so crews see the current site condition and close out items in the same place.
Ask vendors how their software handles your deliverables, file formats, coordinate systems, and data handoff to existing project systems. Confirm whether exports preserve georeferencing, whether the platform supports the datum your project uses, and whether field users can access maps on mobile devices without a desktop license. Check how the platform stores and secures project data, who can view it, and how long it retains it.
A common pattern is to run a small pilot on one site before committing to a platform. Capture a known area, process it, export to the design and project systems, and compare the results against a survey check. That pilot reveals integration problems early, when they are cheap to fix.
Watch out: Choosing software before defining the deliverable and the handoff often forces a costly export workaround later in the project.
The article matches each project phase to the features that matter most, so you can scan the priorities quickly.
| Project type | Prioritize | Why |
|---|---|---|
| Early site work and earthwork | Volume calculation, cut-and-fill tools, elevation comparison | Supports grading decisions against design surfaces |
| Structural and interior progress | Time-based comparison, markup, drawing overlays | Tracks changes between captures |
| Infrastructure and roadway work | Survey-grade accuracy, control point support, design export | Ties the map to real-world coordinates |
| Owner reporting | Cloud sharing, permissions, simple viewer access | Lets non-users review the site easily |
Scheduling Your First Site Map with SkyeTech Aerial
Your first map works best when the goals are clear and the site is ready. Share your deliverables, site boundary, and accuracy needs so the flight and control plan match your project. SkyeTech Aerial flies to FAA Part 107 standards with FAA-certified pilots, and operations are fully insured.
To discuss your site and get a quote, request a free quote. Pricing depends on site size, deliverables, and schedule, so we confirm the details before any work begins. For more on the workflow, read our drone photogrammetry guide for construction sites or see how drone surveying services for construction support project decisions.
Request Free Quote
Frequently Asked Questions
What is mapping in construction?
Mapping in construction means capturing the physical conditions of a jobsite as accurate, location-referenced data. Drones, ground scanners and survey instruments collect images and measurements that are processed into orthomosaic maps, 3D models and point clouds. Project teams use these outputs to track progress, check grading, measure stockpiles and confirm that work matches the plans. The result is a visual, time-stamped record of the site that anyone on the project can compare against design documents.
Is mapping the same as surveying?
Mapping and surveying overlap but are not identical. Traditional surveying uses instruments such as total stations and GNSS receivers to establish precise points, property lines and elevations. Construction mapping typically captures far more points across a site at once, usually from aerial or ground-based imagery, and produces visual outputs that are easier to share. Many projects use both: surveyors establish control points, and mapping captures the broader site conditions between them.
How often should a construction site be mapped?
Most projects map on a schedule tied to major milestones, such as the end of site preparation, completion of foundations, and the close of each structural phase. Larger or fast-moving projects may capture data every one to two weeks to support progress tracking and earthwork measurement. The right frequency depends on how quickly conditions change, the cost of rework, and how much your team relies on current data for decisions. Schedule capture flights in advance so that data is available when reviews happen.
What data can construction mapping provide?
Construction mapping can provide orthomosaic maps for visual site review, 3D models for volume and elevation analysis, and point clouds for measuring structures and terrain. Teams commonly use these outputs to calculate cut and fill volumes, measure stockpiles, compare as-built conditions against design plans and document site progress over time. Time-stamped imagery also creates a record useful for dispute resolution and subcontractor verification.