How to Process LiDAR Point Clouds for Construction Projects
Quick Summary
To process lidar point clouds for construction, first georeference the scan to known control points, then remove noise and crop to the project area. Next, classify ground points, review the ground surface in cross-section, and build a terrain model. Finally, verify accuracy against independent checkpoints before using the data for grading or payment.
- Georeference the scan to control points so coordinates match your project system.
- Remove noise and crop the cloud to the site boundary before classification.
- Review automatic ground classification in cross-section and fix slopes and edges by hand.
- Verify vertical and horizontal accuracy against checkpoints kept separate from processing.
- Document sensor, density, coordinate system, and RMSE with every dataset.
Table of Contents
- What a LiDAR Point Cloud Is and Why Construction Teams Use It
- Choosing LiDAR Point Cloud Processing Software
- Preparing and Cleaning the Raw Point Cloud
- Point Cloud Classification for Construction Workflows
- Building a 3D Site Model From LiDAR Data
- Checking LiDAR Point Cloud Accuracy Before You Use the Data
- Limitations and Common Mistakes to Avoid
- Scheduling Your Next LiDAR Survey for an Active Job Site
- Frequently Asked Questions
How to Process LiDAR Point Clouds for Construction Projects
Last Updated: November 8, 2026
What a LiDAR Point Cloud Is and Why Construction Teams Use It
LiDAR point clouds are sets of 3D coordinates captured by a laser scanner, where each point marks a spot the laser hit. A LiDAR (light detection and ranging) sensor fires thousands of laser pulses per second and measures how long each one takes to bounce back.
The result is a dense cloud of points that traces the shape of a site, from bare ground and stockpiles to steel frames and equipment. For construction teams, the value is simple.
Construction managers at mid-to-large firms use point clouds to track progress, check work against plans, and catch grading errors early. To see the practical site inspection benefits before committing to a workflow, read benefits of LiDAR for site inspection. But raw points are not yet useful. You have to process them first.
Choosing LiDAR Point Cloud Processing Software
The right software depends on what you need from the data. Some tools focus on visualization, while others handle classification, modeling, and measurement.
When you compare options, check these points:
- Input formats: Confirm the software reads your scanner’s output, such as LAS or LAZ files.
- Processing speed: Large site scans can contain hundreds of millions of points.
- Classification tools: Look for automatic ground and object sorting.
- Export options: Make sure you can deliver surfaces, contours, and measurements to your project team.
- Integration: Check whether it works with your existing CAD and project management tools.
A common mistake is buying the most advanced package when a simpler tool covers most of your work. Start with the tasks you do every week, then pay for the features you will actually use.
Preparing and Cleaning the Raw Point Cloud
Raw scan data almost always needs cleanup before it is useful. Noise, duplicate points, and stray readings from birds, dust, or reflective surfaces can throw off your measurements.
Work through these steps in order:
- Georeference the data. Tie the scan to known control points so coordinates match your project’s coordinate system.
- Remove noise. Filter out isolated points that float far from the surfaces around them.
- Thin the cloud if needed. Reduce point density for faster processing, but keep enough detail for the measurements you need.
- Crop to the project area. Remove points outside the site boundary to speed up later steps.
Watch out: skipping georeferencing is the most common cause of mismatched models. A scan that looks perfect on screen can still sit meters away from the true site location.
Point Cloud Classification for Construction Workflows
Classification is the step that turns a raw point cloud into separate, measurable layers. Each point gets assigned to a category such as ground, vegetation, building, or equipment.
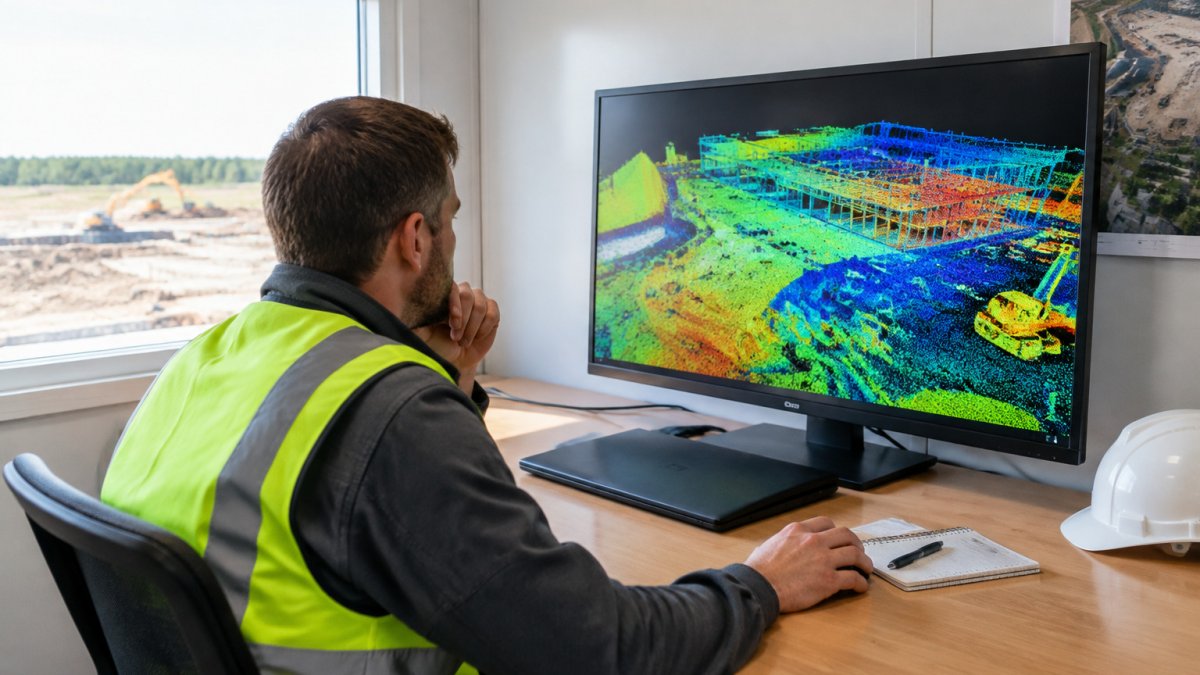
Most processing software runs automatic ground classification first. The common approach is an iterative triangulated irregular network (TIN) densification: the tool builds a provisional ground surface from low points, then adds points that fall within a distance and angle threshold of that surface. You control the result through a few settings:
- Maximum terrain angle: How steep a slope the algorithm will accept as ground. Set it too high and building edges get pulled into the ground layer; too low and real embankments are missed.
- Iteration distance: How far a point can sit from the provisional surface and still be added. Smaller values produce a tighter ground model but can leave gaps under dense structures.
- Cell size: The grid resolution used during classification. Smaller cells capture finer terrain but slow processing on large scans.
After automatic ground classification, review the result by hand in cross-section view. Sloped areas, curbs, retaining walls, and the edges of stockpiles are where automatic routines most often fail. A common pattern is to reclassify a band of points along a slope that the algorithm left as vegetation, then rerun the ground model.
For non-ground categories, construction teams usually separate buildings and structures from vegetation and from equipment. Some software offers trained classifiers for these classes; others rely on height-above-ground thresholds and manual selection.
Quality control on classification is mostly visual and statistical:
- Cross-section review: Slice the cloud at several locations and confirm the ground line follows the true surface.
- Class counts: Compare the percentage of points in each class against expectations for the site. A sudden jump in ground points often means structures were misclassified.
- Volume sanity check: Compute a cut-and-fill volume from the classified ground and compare it to an independent estimate. Large disagreements point to classification errors.
Watch out: classifying before georeferencing or before noise removal compounds errors, because the ground algorithm will treat stray low points as terrain and pull the surface down with them.
A practical sequence for construction work is: georeference, remove noise, classify ground, review ground in cross-section, reclassify problem areas, then derive non-ground classes and build the terrain model. Once the terrain model has been checked against cross-sections, the same attention to consistent surface definition helps keep stockpile volumes reliable when DRONES180 workflows extend from construction sites to mine surveys.
Building a 3D Site Model From LiDAR Data
Once the cloud is clean and classified, you can build a 3D site model. For a closer look at how drone-based mapping and analysis turn site data into usable models for project management, see drone mapping and analysis for construction sites. This model shows the site surface in a form your team can measure, share, and compare against design files.
The usual outputs include:
- Digital terrain model (DTM): Shows bare ground elevation.
- Digital surface model (DSM): Includes buildings, equipment, and other objects.
- Contours and cross sections: Useful for grading checks.
- Volume reports: Used to measure cut and fill and stockpile quantities.
Compare each new model to the last one and to the design surface. The differences show progress and reveal areas that are high or low.
Checking LiDAR Point Cloud Accuracy Before You Use the Data
Accuracy is not a single number.
Vertical accuracy is the error in elevation.
Accuracy is usually reported as a root-mean-square error (RMSE) against independent checkpoints, not against the points used to calibrate the scan. The distinction matters: a model tuned to its own control points will always look accurate.
A workable validation routine for a construction site:
- Establish control. Set ground control points with known coordinates in the project’s coordinate system, and keep a separate set of checkpoints that processing never touches.
- Check point density. Confirm the cloud has enough points per unit area for your smallest feature. Stockpile volumes and grade checks need denser data than rough progress tracking.
- Measure checkpoints. Compare the modeled surface elevation at each checkpoint to the surveyed elevation and compute the vertical RMSE.
- Check horizontal alignment. Compare known features such as building corners or control monuments against their modeled positions.
- Set a tolerance in advance. Decide the acceptable error before the survey, write it into the scope, and reject data that exceeds it.
Watch out: reporting accuracy against the same control points used to georeference the scan is the most common way teams overstate data quality. Always keep a separate checkpoint set.
Document the method with each dataset: sensor model, flight or scan height, point density, coordinate system, number of control and checkpoints, and the resulting RMSE. That record is what lets a reviewer, owner, or inspector trust the model without rerunning the survey.
Limitations and Common Mistakes to Avoid
Point clouds are powerful, but they have limits. Knowing them early saves rework.
- Dense vegetation can block the laser from reaching the ground underneath.
- Glass, water, and dark or wet surfaces may return weak or missing readings.
- Small details can disappear if point density is too low for the job.
- Moving equipment can leave ghost points in a scan.
- Skipping quality control leads to models that look right but measure wrong.
A frequent mistake is treating the point cloud as a finished product. It is a measurement record. Clean it, classify it, check it, and only then use it for decisions.
Scheduling Your Next LiDAR Survey for an Active Job Site
Timing matters. When you are ready to schedule a survey, you can request a free quote from SkyeTech Aerial for mapping, inspections, and data analysis. Schedule scans for periods when the site is stable and the work you need to measure is visible. Plan around heavy equipment movement, weather, and crew activity so the data reflects real conditions.
| Task | Typical Purpose | Timing Consideration |
|---|---|---|
| Baseline survey | Record existing ground before work starts | Before site disturbance |
| Progress survey | Track earthwork and structures | Regular intervals, such as weekly or monthly |
| Pre-pour or pre-cover check | Verify grades before concrete or backfill | Before material is placed |
| Stockpile survey | Measure material quantities | When piles are accessible and stable |
If you need a survey on an active job site and want help planning the flight, processing the data, or building the 3D model, contact SkyeTech Aerial to request a free quote. Our FAA-certified pilots fly to FAA Part 107 standards, and our operations are fully insured. We use platforms such as DroneDeploy, Pix4D, and DJI Terra to turn raw data into models your team can use.
Frequently Asked Questions
How accurate is a LiDAR point cloud for construction?
Accuracy depends on the sensor, flight height, and processing workflow. Verify any model against surveyed checkpoints before using it for grading or payment decisions.
What software do I need to process a LiDAR point cloud?
You need software that reads LAS or LAZ files, filters noise, classifies points, and generates surfaces. The best choice depends on whether your priority is visualization, measurement, or modeling.
How long does it take to process a LiDAR survey?
Processing time depends on file size, point density, and computing power. Large site scans can take hours to process, so plan for that in your project schedule.
Can LiDAR replace traditional site surveys?
LiDAR can cover large areas quickly and capture detail that manual methods miss. Many teams still use ground survey control points to verify the data, so the two methods often work together.
What should I request from a LiDAR survey provider?
Ask for the sensor used, the coordinate system, checkpoint accuracy results, and the deliverable formats. Request a written accuracy statement with each dataset.
Frequently Asked Questions
What does LiDAR mapping do?
LiDAR mapping uses a laser scanner to measure distances to surfaces many times per second, producing a point cloud, which is a dense set of 3D coordinates describing the ground, structures, and equipment on a site. Construction teams use these measurements to calculate volumes, check grading against design plans, verify as-built conditions, and track progress over time. Because the laser returns measure geometry directly, the data supports measurements that are difficult to take reliably with a tape or total station across large areas.
What software is used to process LiDAR point clouds?
Teams typically use a combination of tools: a dedicated point cloud processing package for registration, noise removal, and classification, plus CAD or GIS software for modeling and analysis. Choose software that reads common formats such as LAS and LAZ, supports ground and object classification, and exports surfaces in formats your design and project management tools accept.
How accurate is drone LiDAR mapping for construction?
Accuracy depends on the sensor, the flight altitude, the quality of the GNSS and inertial positioning, and the number of ground control checkpoints used to validate the survey. Survey-grade results are verified by comparing the point cloud against independently surveyed checkpoints and reporting the resulting error. Always ask for a written accuracy report that lists checkpoint residuals before relying on the data for grading or payment decisions.
What deliverables can be created from construction LiDAR data?
Common deliverables include a classified point cloud, a digital terrain model, a digital surface model, contour lines, cut-and-fill volume reports, cross-sections, and 3D site models for design review. Teams also use the data to compare progress between survey dates and to confirm subcontractor work against the design surface. The right deliverable set depends on the questions your project team needs answered at each milestone.